10 Essential React Interview Questions For Aspiring Frontend Developers
Comprehensive React Cheatsheet included at the bottom of this article!
Resources:
/* ******************************************************************************************* | |
* REACT.JS CHEATSHEET | |
* DOCUMENTATION: https://reactjs.org/docs/ | |
* FILE STRUCTURE: https://reactjs.org/docs/faq-structure.html | |
* ******************************************************************************************* */ | |
``` | |
npm install --save react // declarative and flexible JavaScript library for building UI | |
npm install --save react-dom // serves as the entry point of the DOM-related rendering paths | |
npm install --save prop-types // runtime type checking for React props and similar objects | |
``` | |
// notes: don't forget the command lines | |
/* ******************************************************************************************* | |
* REACT | |
* https://reactjs.org/docs/react-api.html | |
* ******************************************************************************************* */ | |
// Create and return a new React element of the given type. | |
// Code written with JSX will be converted to use React.createElement(). | |
// You will not typically invoke React.createElement() directly if you are using JSX. | |
React.createElement( | |
type, | |
[props], | |
[...children] | |
) | |
// Clone and return a new React element using element as the starting point. | |
// The resulting element will have the original element’s props with the new props merged in shallowly. | |
React.cloneElement( | |
element, | |
[props], | |
[...children] | |
) | |
// Verifies the object is a React element. Returns true or false. | |
React.isValidElement(object) | |
React.Children // provides utilities for dealing with the this.props.children opaque data structure. | |
// Invokes a function on every immediate child contained within children with this set to thisArg. | |
React.Children.map(children, function[(thisArg)]) | |
// Like React.Children.map() but does not return an array. | |
React.Children.forEach(children, function[(thisArg)]) | |
// Returns the total number of components in children, | |
// equal to the number of times that a callback passed to map or forEach would be invoked. | |
React.Children.count(children) | |
// Verifies that children has only one child (a React element) and returns it. | |
// Otherwise this method throws an error. | |
React.Children.only(children) | |
// Returns the children opaque data structure as a flat array with keys assigned to each child. | |
// Useful if you want to manipulate collections of children in your render methods, | |
// especially if you want to reorder or slice this.props.children before passing it down. | |
React.Children.toArray(children) | |
// The React.Fragment component lets you return multiple elements in a render() method without creating an additional DOM element | |
// You can also use it with the shorthand <></> syntax. | |
React.Fragment | |
/* ******************************************************************************************* | |
* REACT.COMPONENT | |
* React.Component is an abstract base class, so it rarely makes sense to refer to React.Component | |
* directly. Instead, you will typically subclass it, and define at least a render() method. | |
* https://reactjs.org/docs/react-component.html | |
* ******************************************************************************************* */ | |
class Component extends React.Component { | |
// Will be called before it is mounted | |
constructor(props) { | |
// Call this method before any other statement | |
// or this.props will be undefined in the constructor | |
super(props); | |
// The constructor is also often used to bind event handlers to the class instance. | |
// Binding makes sure the method has access to component attributes like this.props and this.state | |
this.method = this.method.bind(this); | |
// The constructor is the right place to initialize state. | |
this.state = { | |
active: true, | |
// In rare cases, it’s okay to initialize state based on props. | |
// This effectively “forks” the props and sets the state with the initial props. | |
// If you “fork” props by using them for state, you might also want to implement componentWillReceiveProps(nextProps) | |
// to keep the state up-to-date with them. But lifting state up is often easier and less bug-prone. | |
color: props.initialColor | |
}; | |
} | |
// Enqueues changes to the component state and | |
// tells React that this component and its children need to be re-rendered with the updated state. | |
// setState() does not always immediately update the component. It may batch or defer the update until later. | |
// This makes reading this.state right after calling setState() a potential pitfall. | |
// Instead, use componentDidUpdate or a setState callback. | |
// You may optionally pass an object as the first argument to setState() instead of a function. | |
setState(updater[, callback]) { } | |
// Invoked just before mounting occurs (before render()) | |
// This is the only lifecycle hook called on server rendering. | |
componentWillMount() { } | |
// Invoked immediately after a component is mounted. | |
// Initialization that requires DOM nodes should go here. | |
// If you need to load data from a remote endpoint, this is a good place to instantiate the network request. | |
// This method is a good place to set up any subscriptions. If you do that, don’t forget to unsubscribe in componentWillUnmount(). | |
componentDidMount() { } | |
// Invoked before a mounted component receives new props. | |
// If you need to update the state in response to prop changes (for example, to reset it), | |
// you may compare this.props and nextProps and perform state transitions using this.setState() in this method. | |
componentWillReceiveProps(nextProps) { } | |
// Let React know if a component’s output is not affected by the current change in state or props. | |
// The default behavior is to re-render on every state change, and in the vast majority of cases you should rely on the default behavior. | |
// shouldComponentUpdate() is invoked before rendering when new props or state are being received. Defaults to true. | |
// This method is not called for the initial render or when forceUpdate() is used. | |
// Returning false does not prevent child components from re-rendering when their state changes. | |
shouldComponentUpdate(nextProps, nextState) { } | |
// Invoked just before rendering when new props or state are being received. | |
// Use this as an opportunity to perform preparation before an update occurs. This method is not called for the initial render. | |
// Note that you cannot call this.setState() here; nor should you do anything else | |
// (e.g. dispatch a Redux action) that would trigger an update to a React component before componentWillUpdate() returns. | |
// If you need to update state in response to props changes, use componentWillReceiveProps() instead. | |
componentWillUpdate(nextProps, nextState) { } | |
// Invoked immediately after updating occurs. This method is not called for the initial render. | |
// Use this as an opportunity to operate on the DOM when the component has been updated. | |
// This is also a good place to do network requests as long as you compare the current props to previous props (e.g. a network request may not be necessary if the props have not changed). | |
componentDidUpdate(prevProps, prevState) { } | |
// Invoked immediately before a component is unmounted and destroyed. | |
// Perform any necessary cleanup in this method, such as invalidating timers, canceling network requests, | |
// or cleaning up any subscriptions that were created in componentDidMount(). | |
componentWillUnmount() { } | |
// Error boundaries are React components that catch JavaScript errors anywhere in their child component tree, | |
// log those errors, and display a fallback UI instead of the component tree that crashed. | |
// Error boundaries catch errors during rendering, in lifecycle methods, and in constructors of the whole tree below them. | |
componentDidCatch() { } | |
// This method is required. | |
// It should be pure, meaning that it does not modify component state, | |
// it returns the same result each time it’s invoked, and | |
// it does not directly interact with the browser (use lifecycle methods for this) | |
// It must return one of the following types: react elements, string and numbers, portals, null or booleans. | |
render() { | |
// Contains the props that were defined by the caller of this component. | |
console.log(this.props); | |
// Contains data specific to this component that may change over time. | |
// The state is user-defined, and it should be a plain JavaScript object. | |
// If you don’t use it in render(), it shouldn’t be in the state. | |
// For example, you can put timer IDs directly on the instance. | |
// Never mutate this.state directly, as calling setState() afterwards may replace the mutation you made. | |
// Treat this.state as if it were immutable. | |
console.log(this.state); | |
return ( | |
<div> | |
{/* Comment goes here */} | |
Hello, {this.props.name}! | |
</div> | |
); | |
} | |
} | |
// Can be defined as a property on the component class itself, to set the default props for the class. | |
// This is used for undefined props, but not for null props. | |
Component.defaultProps = { | |
color: 'blue' | |
}; | |
component = new Component(); | |
// By default, when your component’s state or props change, your component will re-render. | |
// If your render() method depends on some other data, you can tell React that the component needs re-rendering by calling forceUpdate(). | |
// Normally you should try to avoid all uses of forceUpdate() and only read from this.props and this.state in render(). | |
component.forceUpdate(callback) | |
/* ******************************************************************************************* | |
* REACT.DOM | |
* The react-dom package provides DOM-specific methods that can be used at the top level of | |
* your app and as an escape hatch to get outside of the React model if you need to. | |
* Most of your components should not need to use this module. | |
* https://reactjs.org/docs/react-dom.html | |
* ******************************************************************************************* */ | |
// Render a React element into the DOM in the supplied container and return a reference | |
// to the component (or returns null for stateless components). | |
ReactDOM.render(element, container[, callback]) | |
// Same as render(), but is used to hydrate a container whose HTML contents were rendered | |
// by ReactDOMServer. React will attempt to attach event listeners to the existing markup. | |
ReactDOM.hydrate(element, container[, callback]) | |
// Remove a mounted React component from the DOM and clean up its event handlers and state. | |
// If no component was mounted in the container, calling this function does nothing. | |
// Returns true if a component was unmounted and false if there was no component to unmount. | |
ReactDOM.unmountComponentAtNode(container) | |
// If this component has been mounted into the DOM, this returns the corresponding native browser | |
// DOM element. This method is useful for reading values out of the DOM, such as form field values | |
// and performing DOM measurements. In most cases, you can attach a ref to the DOM node and avoid | |
// using findDOMNode at all. | |
ReactDOM.findDOMNode(component) | |
// Creates a portal. Portals provide a way to render children into a DOM node that exists outside | |
// the hierarchy of the DOM component. | |
ReactDOM.createPortal(child, container) | |
/* ******************************************************************************************* | |
* REACTDOMSERVER | |
* The ReactDOMServer object enables you to render components to static markup. | |
* https://reactjs.org/docs/react-dom.html | |
* ******************************************************************************************* */ | |
// Render a React element to its initial HTML. React will return an HTML string. | |
// You can use this method to generate HTML on the server and send the markup down on the initial | |
// request for faster page loads and to allow search engines to crawl your pages for SEO purposes. | |
ReactDOMServer.renderToString(element) | |
// Similar to renderToString, except this doesn’t create extra DOM attributes that React uses | |
// internally, such as data-reactroot. This is useful if you want to use React as a simple static | |
// page generator, as stripping away the extra attributes can save some bytes. | |
ReactDOMServer.renderToStaticMarkup(element) | |
// Render a React element to its initial HTML. Returns a Readable stream that outputs an HTML string. | |
// The HTML output by this stream is exactly equal to what ReactDOMServer.renderToString would return. | |
// You can use this method to generate HTML on the server and send the markup down on the initial | |
// request for faster page loads and to allow search engines to crawl your pages for SEO purposes. | |
ReactDOMServer.renderToNodeStream(element) | |
// Similar to renderToNodeStream, except this doesn’t create extra DOM attributes that React uses | |
// internally, such as data-reactroot. This is useful if you want to use React as a simple static | |
// page generator, as stripping away the extra attributes can save some bytes. | |
ReactDOMServer.renderToStaticNodeStream(element) | |
/* ******************************************************************************************* | |
* TYPECHECKING WITH PROPTYPES | |
* https://reactjs.org/docs/typechecking-with-proptypes.html | |
* ******************************************************************************************* */ | |
import PropTypes from 'prop-types'; | |
MyComponent.propTypes = { | |
// You can declare that a prop is a specific JS type. By default, these | |
// are all optional. | |
optionalArray: PropTypes.array, | |
optionalBool: PropTypes.bool, | |
optionalFunc: PropTypes.func, | |
optionalNumber: PropTypes.number, | |
optionalObject: PropTypes.object, | |
optionalString: PropTypes.string, | |
optionalSymbol: PropTypes.symbol, | |
// Anything that can be rendered: numbers, strings, elements or an array | |
// (or fragment) containing these types. | |
optionalNode: PropTypes.node, | |
// A React element. | |
optionalElement: PropTypes.element, | |
// You can also declare that a prop is an instance of a class. This uses | |
// JS's instanceof operator. | |
optionalMessage: PropTypes.instanceOf(Message), | |
// You can ensure that your prop is limited to specific values by treating | |
// it as an enum. | |
optionalEnum: PropTypes.oneOf(['News', 'Photos']), | |
// An object that could be one of many types | |
optionalUnion: PropTypes.oneOfType([ | |
PropTypes.string, | |
PropTypes.number, | |
PropTypes.instanceOf(Message) | |
]), | |
// An array of a certain type | |
optionalArrayOf: PropTypes.arrayOf(PropTypes.number), | |
// An object with property values of a certain type | |
optionalObjectOf: PropTypes.objectOf(PropTypes.number), | |
// An object taking on a particular shape | |
optionalObjectWithShape: PropTypes.shape({ | |
color: PropTypes.string, | |
fontSize: PropTypes.number | |
}), | |
// You can chain any of the above with `isRequired` to make sure a warning | |
// is shown if the prop isn't provided. | |
requiredFunc: PropTypes.func.isRequired, | |
// A value of any data type | |
requiredAny: PropTypes.any.isRequired, | |
// You can also specify a custom validator. It should return an Error | |
// object if the validation fails. Don't `console.warn` or throw, as this | |
// won't work inside `oneOfType`. | |
customProp: function(props, propName, componentName) { | |
if (!/matchme/.test(props[propName])) { | |
return new Error( | |
'Invalid prop `' + propName + '` supplied to' + | |
' `' + componentName + '`. Validation failed.' | |
); | |
} | |
}, | |
// You can also supply a custom validator to `arrayOf` and `objectOf`. | |
// It should return an Error object if the validation fails. The validator | |
// will be called for each key in the array or object. The first two | |
// arguments of the validator are the array or object itself, and the | |
// current item's key. | |
customArrayProp: PropTypes.arrayOf(function(propValue, key, componentName, location, propFullName) { | |
if (!/matchme/.test(propValue[key])) { | |
return new Error( | |
'Invalid prop `' + propFullName + '` supplied to' + | |
' `' + componentName + '`. Validation failed.' | |
); | |
} | |
}) | |
}; |
All of the code examples below will be included a second time at the bottom of this article as an embedded gist.javascript.plainenglish.io
As I learn to build web applications in React I will blog about it in this series in an attempt to capture the…bryanguner.medium.com
A JavaScript library for building user interfaces Declarative React makes it painless to create interactive UIs. Design…github.com
Also … here is my brand new blog site… built with react and a static site generator called GatsbyJS!
It’s a work in progress

Beginning of the Article:
Pros
- Easy to learn
- HTML-like syntax allows templating and highly detailed documentation
- Supports server-side rendering
- Easy migrating between different versions of React
- Uses JavaScript rather than framework-specific code
Cons
- Poor documentation
- Limited to only view part of MVC
- New developers might see JSC as a barrier
Where to Use React
- For apps that have multiple events
- When your app development team excels in CSS, JavaScript and HTML
- You want to create sharable components on your app
- When you need a personalized app solution
Misconceptions about React
React is a framework:
Many developers and aspiring students misinterpret React to be a fully functional framework. It is because we often compare React with major frameworks such as Angular and Ember. This comparison is not to compare the best frameworks but to focus on the differences and similarities of React and Angular’s approach that makes their offerings worth studying. Angular works on the MVC model to support the Model, View, and Controller layers of an app. React focuses only on the ‘V,’ which is the view layer of an application and how to make handling it easier to integrate smoothly into a project.
React’s Virtual DOM is faster than DOM.
React uses a Virtual DOM, which is essentially a tree of JavaScript objects representing the actual browser DOM. The advantage of using this for the developers is that they don’t manipulate the DOM directly as developers do with jQuery when they write React apps. Instead, they would tell React how they want the DOM to make changes to the state object and allow React to make the necessary updates to the browser DOM. This helps create a comprehensive development model for developers as they don’t need to track all DOM changes. They can modify the state object, and React would use its algorithms to understand what part of UI changed compared to the previous DOM. Using this information updates the actual browser DOM. Virtual DOM provides an excellent API for creating UI and minimizes the update count to be made on the browser DOM.
However, it is not faster than the actual DOM. You just read that it needs to pull extra strings to figure out what part of UI needs to be updated before actually performing those updates. Hence, Virtual DOM is beneficial for many things, but it isn’t faster than DOM.
1. Explain how React uses a tree data structure called the virtual DOM to model the DOM
The virtual DOM is a copy of the actual DOM tree. Updates in React are made to the virtual DOM. React uses a diffing algorithm to reconcile the changes and send the to the DOM to commit and paint.
2. Create virtual DOM nodes using JSX To create a React virtual DOM node using JSX, define HTML syntax in a JavaScript file.
const hello = <h1>Hello World!</h1>; |
Here, the JavaScript hello variable is set to a React virtual DOM h1 element with the text “Hello World!”.
You can also nest virtual DOM nodes in each other just like how you do it in HTML with the real DOM.
3. Use debugging tools to determine when a component is rendering
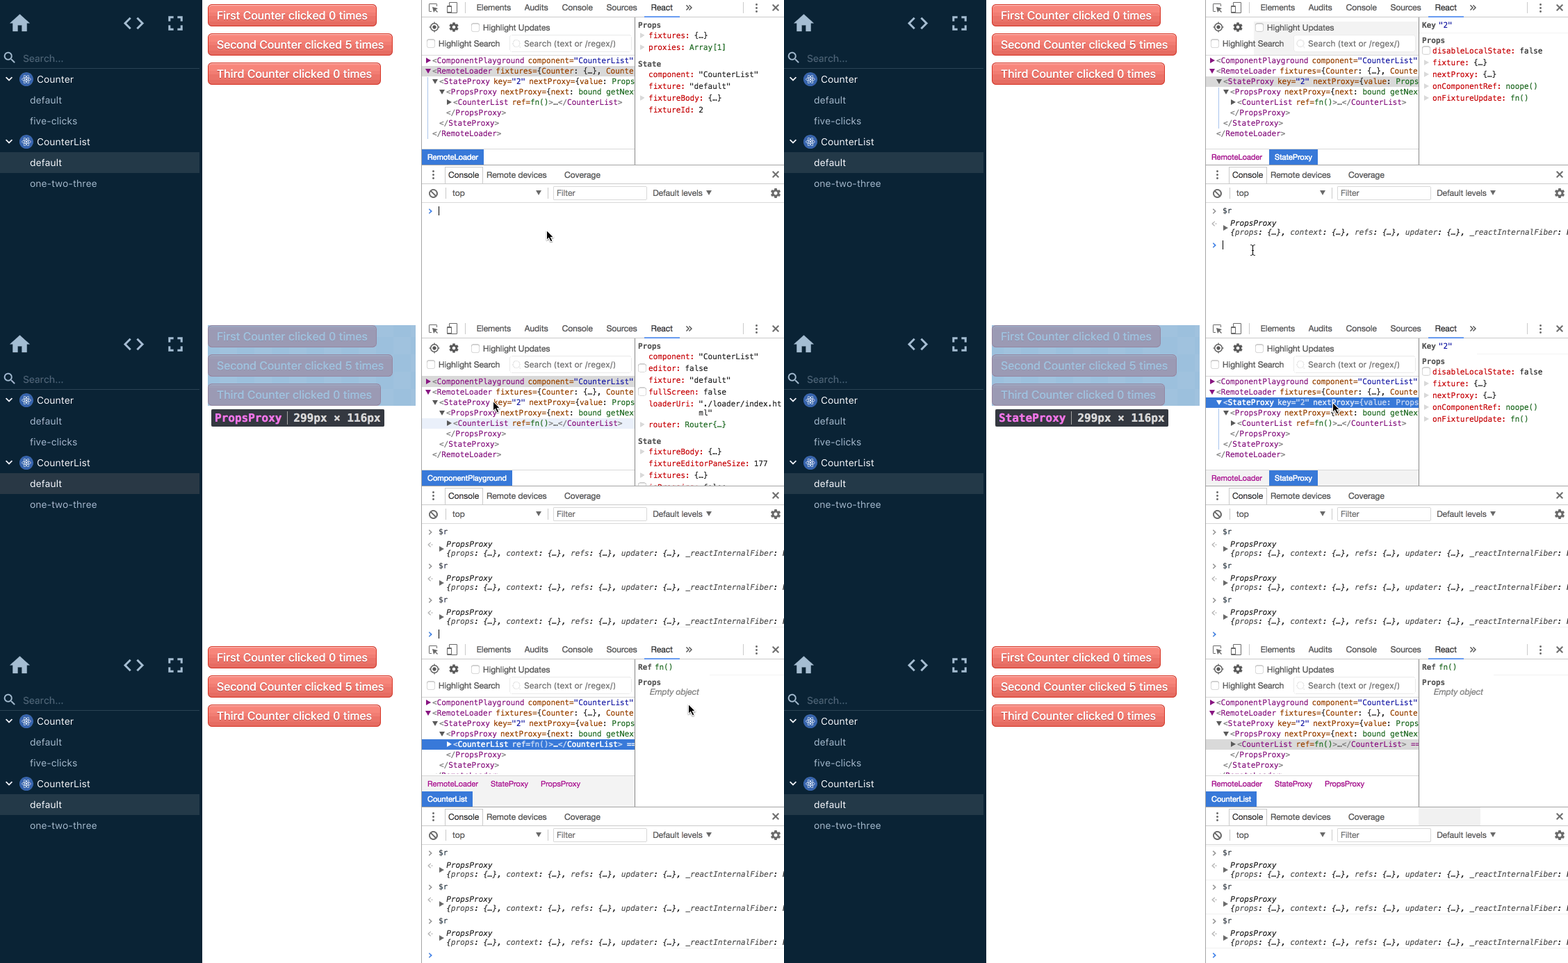
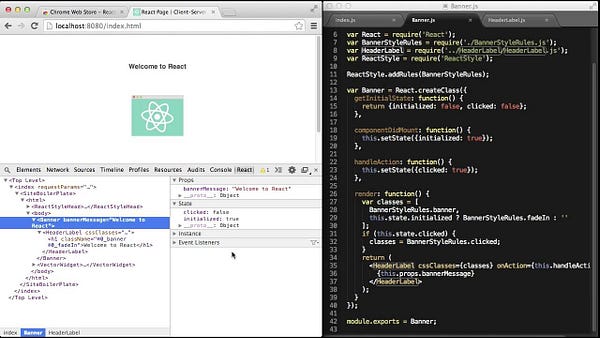
We use the React DevTools extension as an extension in our Browser DevTools to debug and view when a component is rendering
4. Describe how JSX transforms into actual DOM nodes
- To transfer JSX into DOM nodes, we use the ReactDOM.render method. It takes a React virtual DOM node’s changes allows Babel to transpile it and sends the JS changes to commit to the DOM.
5. Use the ReactDOM.render
method to have React render your virtual DOM nodes under an
actual DOM node
import React from 'react'; | |
import ReactDOM from 'react-dom'; | |
import App from './App'; | |
ReactDOM.render( | |
<React.StrictMode> | |
<App /> | |
</React.StrictMode>, | |
document.getElementById('root') | |
); |
6. Attach an event listener to an actual DOM node using a virtual node
The virtual DOM (VDOM) is a programming concept where an ideal, or “virtual”, representation of a UI is kept in memory and synced with the “real” DOM by a library such as ReactDOM. This process is called reconciliation.
This approach enables the declarative API of React: You tell React what state you want the UI to be in, and it makes sure the DOM matches that state. This abstracts out the attribute manipulation, event handling, and manual DOM updating that you would otherwise have to use to build your app.
Since “virtual DOM” is more of a pattern than a specific technology, people sometimes say it to mean different things. In React world, the term “virtual DOM” is usually associated with React elements since they are the objects representing the user interface. React, however, also uses internal objects called “fibers” to hold additional information about the component tree. They may also be considered a part of “virtual DOM” implementation in React.
Is the Shadow DOM the same as the Virtual DOM?
No, they are different. The Shadow DOM is a browser technology designed primarily for scoping variables and CSS in web components. The virtual DOM is a concept implemented by libraries in JavaScript on top of browser APIs.
- To add an event listener to an element, define a method to handle the event and associate that method with the element event you want to listen for:
function AlertButton() { | |
showAlert = () => { | |
window.alert('Button clicked!'); | |
}; | |
return ( | |
<button type='button' onClick={showAlert}> | |
Click Me | |
</button> | |
); | |
} | |
export default AlertButton; |
7. Use create-react-app
to initialize a new React app and import required
dependencies
- Create the default create-react-application by typing in our terminal
Explanation of npm vs npx from Free Code Camp:
npm (node package manager) is the dependency/package manager you get out of the box when you install Node.js. It provides a way for developers to install packages both globally and locally.
Sometimes you might want to take a look at a specific package
and try out some commands. But you cannot do that without
installing the dependencies in your local
node_modules
folder.
npm the package manager
npm is a couple of things. First and foremost, it is an online repository for the publishing of open-source Node.js projects.
Second, it is a CLI tool that aids you to install those packages and manage their versions and dependencies. There are hundreds of thousands of Node.js libraries and applications on npm and many more are added every day.
npm by itself doesn’t run any packages. If you want to run a
package using npm, you must specify that package in your
package.json
file.
When executables are installed via npm packages, npm creates links to them:
-
local
installs have links created at the
./node_modules/.bin/
directory -
global
installs have links created from the global
bin/
directory (for example:/usr/local/bin
on Linux or at%AppData%/npm
on Windows)
To execute a package with npm you either have to type the local path, like this:
$ ./node_modules/.bin/your-package
or you can run a locally installed package by adding it into
your
package.json
file in the scripts section, like this:
{
"name": "your-application",
"version": "1.0.0",
"scripts": {
"your-package": "your-package"
}
}
Then you can run the script using
npm run
:
npm run your-package
You can see that running a package with plain npm requires quite a bit of ceremony.
Fortunately, this is where npx comes in handy.
npx the package runner
Since npm version 5.2.0 npx is pre-bundled with npm. So it’s pretty much a standard nowadays.
npx is also a CLI tool whose purpose is to make it easy to install and manage dependencies hosted in the npm registry.
It’s now very easy to run any sort of Node.js-based executable that you would normally install via npm.
You can run the following command to see if it is already installed for your current npm version:
$ which npx
If it’s not, you can install it like this:
$ npm install -g npx
Once you make sure you have it installed, let’s see a few of the use cases that make npx extremely helpful.
Run a locally installed package easily
If you wish to execute a locally installed package, all you need to do is type:
$ npx your-package
npx will check whether
<command>
or
<package>
exists in
$PATH
, or in
the local project binaries, and if so it will execute it.
Execute packages that are not previously installed
Another major advantage is the ability to execute a package that wasn’t previously installed.
Sometimes you just want to use some CLI tools but you don’t want to install them globally just to test them out. This means you can save some disk space and simply run them only when you need them. This also means your global variables will be less polluted.
Now, where were we?
npx create-react-app <name of app> --use-npm
-
npx gives us the latest version.
--use-npm
just means to use npm instead of yarn or some other package manager
8. Pass props into a React component
-
props
is an object that gets passed down from the parent component to the child component. The values can be of any data structure including a function (which is an object)
function NavBar() { | |
return ( | |
<nav> | |
<h1>Pet App</h1> | |
// props being passed in component | |
<NavLinks hello='world' /> | |
</nav> | |
); | |
} |
- You can also interpolate values into JSX.
- Set a variable to the string, “world”, and replace the string of “world” in the NavLinks JSX element with the variable wrapped in curly braces:
function NavBar() { | |
const world = 'world'; | |
return ( | |
<nav> | |
<h1>Pet App</h1> | |
//props passes as a variable | |
<NavLinks hello={world} /> | |
</nav> | |
); | |
} |
Accessing props:
To access our props object in another component we pass it the props argument and React will invoke the functional component with the props object.
Reminder:
Conceptually, components are like JavaScript functions. They accept arbitrary inputs (called “props”) and return React elements describing what should appear on the screen.
Function and Class Components
The simplest way to define a component is to write a JavaScript function:
function Welcome(props) {
return <h1>Hello, {props.name}</h1>;
}
This function is a valid React component because it accepts a single “props” (which stands for properties) object argument with data and returns a React element. We call such components “function components” because they are literally JavaScript functions.
You can also use an ES6 class to define a component:
class Welcome extends React.Component {
render() {
return <h1>Hello, {this.props.name}</h1>;
}
}
The above two components are equivalent from React’s point of view.
function NavLinks(props) { | |
return ( | |
<ul> | |
<li> | |
<a href='/hello'>{props.hello}</a> | |
</li> | |
<li className='selected'> | |
<a href='/pets'>Pets</a> | |
</li> | |
<li> | |
<a href='/owners'>Owners</a> | |
</li> | |
</ul> | |
); | |
} |
- You can pass down as many props keys as you want.
9. Destructure props
You can destructure the props object in the function component’s parameter.
function NavLinks({ hello, color }) { | |
return ( | |
<ul> | |
<li> | |
<a href='/hello'>{hello}</a> | |
</li> | |
<li className='selected'> | |
<a href='/pets'>Pets</a> | |
</li> | |
<li> | |
<a href='/owners'>Owners</a> | |
</li> | |
</ul> | |
); | |
} |
10. Create routes using components from the react-router-dom package
a. Import the react-router-dom package:
npm i react-router-dom
In your index.js:
// ./src/index.js | |
import React from "react"; | |
import ReactDOM from "react-dom"; | |
import { BrowserRouter } from "react-router-dom"; | |
import App from "./App"; | |
const Root = () => { | |
return ( | |
<BrowserRouter> | |
<App /> | |
</BrowserRouter> | |
); | |
}; | |
ReactDOM.render( | |
<React.StrictMode> | |
{" "} | |
<Root />{" "} | |
</React.StrictMode>, | |
document.getElementById("root") | |
); |
- Above you import your BrowserRouter with which you can wrap your entire route hierarchy. This makes routing information from React Router available to all its descendent components.
- Then in the component of your choosing, usually top tier such as App.js, you can create your routes using the Route and Switch Components
import { Route, Switch } from "react"; | |
import Home from "./components/Home"; | |
<Switch> | |
<Route exact path="/"> | |
<Home /> | |
</Route> | |
<Route exact path="/users"> | |
<Users /> | |
</Route> | |
</Switch>; |
Discover More:
Memoization, Tabulation, and Sorting Algorithms by Example Why is looking at runtime not a reliable method of…bgoonz-blog.netlify.app
REACT CHEAT SHEET:
React.Component · render() · componentDidMount() · props/state · dangerouslySetInnerHTML · React is a JavaScript library for building user interfaces. This guide targets React v15 to v16.
React is a JavaScript library for building user interfaces. This guide targets React v15 to v16.
render() {
return <div />;
}
constructor(props) {
super(props);
this.state = {
list: props.initialList
};
}
// where props aren't used in constructor
constructor() {
super();
this.state = {
list: []
};
}
componentWillMount() {
// invoked once.
// fires before initial 'render'
}
componentDidMount() {
// good for AJAX: fetch, ajax, or subscriptions.
// invoked once (client-side only).
// fires before initial 'render'
}
componentWillReceiveProps(nextProps) {
// invoked every time component recieves new props.
// does not before initial 'render'
}
shouldComponentUpdate(nextProps, nextState) {
// invoked before every update (new props or state).
// does not fire before initial 'render'.
}
componentWillUpdate(nextProps, nextState) {
// invoked immediately before update (new props or state).
// does not fire before initial 'render'.
// (see componentWillReceiveProps if you need to call setState)
}
✖ this.setState
componentDidUpdate(prevProps, prevState) {
// invoked immediately after DOM updates
// does not fire after initial 'render'
}
componentWillUnmount() {
// invoked immediately before a component is unmounted.
}
// good for state transitions
this.setState((prevState, props) => {
return {count: prevState.count + props.step};
});
// good for static values
this.setState({mykey: 'my new value'});
```
setState (optional callback)
----------------------------
```js
// fires after setState
// prefer componentDidUpdate
this.setState(
(prevState, props) => ({ count: prevState.count + props.step }),
() => console.log(this.state.count)
);
// forces a re-render; AVOID if possible
this.forceUpdate();
displayName: "MyComponent"
```
defaultProps
------------
```js
class Greeting extends React.Component {
render() {
return <h1>Hi {this.props.name}</h1>
}
}
CustomButton.defaultProps = {
name: 'guest'
};
React.Children.map(this.props.children, (child, i) => {
return child;
})
React.Children.forEach(this.props.children, (child, i) => {
console.log(child + ' at index: ' + i);
})
React.Children.count(this.props.children);
React.Children.only(this.props.children);
React.Children.toArray(this.props.children)
// requires 'prop-types' library
import { string } from "prop-types";
class Cowboy extends React.Component {
childContextTypes: {
salutation: string
}
getChildContext() {
return { salutation: "Howdy" };
}
render() {
return React.Children.only(this.props.children);
}
}
const Greeting = (props, context) =>
<div>{context.salutation} {props.name}.</div>
Greeting.contextTypes = {
salutation: PropTypes.string
}
// <Greeting name="Michael" />
// => Michael.
// <Cowboy><Greeting name="Michael" /></Cowboy>
// => Howdy Michael.
// add to the context-aware component
// requires 'prop-types' library
contextTypes: {
color: PropTypes.string
},
// add to the context provider
// requires 'prop-types' library
childContextTypes: {
color: PropTypes.string
},
// add to the context provider
getChildContext() {
return {color: "purple"};
}
#Components
import React from 'react'
import ReactDOM from 'react-dom'
class Hello extends React.Component {
render () {
return <div className='message-box'>
Hello {this.props.name}
</div>
}
}
const el = document.body
ReactDOM.render(<Hello name='John' />, el)
Use the React.js jsfiddle to start hacking. (or the unofficial jsbin)
import React, {Component} from 'react'
import ReactDOM from 'react-dom'
class Hello extends Component {
...
}
<Video fullscreen={true} autoplay={false} />
render () {
this.props.fullscreen
const { fullscreen, autoplay } = this.props
···
}
Use this.props
to access properties passed to the component.
See: Properties
constructor(props) {
super(props)
this.state = { username: undefined }
}
this.setState({ username: 'rstacruz' })
render () {
this.state.username
const { username } = this.state
···
}
Use states (this.state
) to manage dynamic data.
With Babel you can use proposal-class-fields and get rid of constructor
class Hello extends Component {
state = { username: undefined };
...
}
See: States
class Info extends Component {
render () {
const { avatar, username } = this.props
return <div>
<UserAvatar src={avatar} />
<UserProfile username={username} />
</div>
}
}
As of React v16.2.0, fragments can be used to return multiple children without adding extra wrapping nodes to the DOM.
import React, {
Component,
Fragment
} from 'react'
class Info extends Component {
render () {
const { avatar, username } = this.props
return (
<Fragment>
<UserAvatar src={avatar} />
<UserProfile username={username} />
</Fragment>
)
}
}
Nest components to separate concerns.
See: Composing Components
<AlertBox>
<h1>You have pending notifications</h1>
</AlertBox>
class AlertBox extends Component {
render () {
return <div className='alert-box'>
{this.props.children}
</div>
}
}
Children are passed as the children
property.
#Defaults
Hello.defaultProps = {
color: 'blue'
}
See: defaultProps
class Hello extends Component {
constructor (props) {
super(props)
this.state = { visible: true }
}
}
Set the default state in the constructor()
.
And without constructor using Babel with proposal-class-fields.
class Hello extends Component {
state = { visible: true }
}
See: Setting the default state
#Other components
function MyComponent ({ name }) {
return <div className='message-box'>
Hello {name}
</div>
}
Functional components have no state. Also, their props
are passed as the first parameter to a function.
See: Function and Class Components
import React, {PureComponent} from 'react'
class MessageBox extends PureComponent {
···
}
Performance-optimized version of React.Component
. Doesn’t rerender if props/state hasn’t changed.
See: Pure components
this.forceUpdate()
this.setState({ ... })
this.setState(state => { ... })
this.state
this.props
These methods and properties are available for Component
instances.
See: Component API
#Lifecycle
Method | Description |
---|---|
constructor (props) |
Before rendering # |
componentWillMount() |
Don’t use this # |
render() |
Render # |
componentDidMount() |
After rendering (DOM available) # |
componentWillUnmount() |
Before DOM removal # |
componentDidCatch() |
Catch errors (16+) # |
Set initial the state on constructor()
. Add DOM event handlers, timers (etc) on componentDidMount()
, then remove them on componentWillUnmount()
.
Method | Description |
---|---|
componentDidUpdate (prevProps, prevState, snapshot) |
Use setState() here, but remember to compare props |
shouldComponentUpdate (newProps, newState) |
Skips render() if returns false |
render() |
Render |
componentDidUpdate (prevProps, prevState) |
Operate on the DOM here |
Called when parents change properties and .setState()
. These are not called for initial renders.
See: Component specs
#Hooks (New)
import React, { useState } from 'react';
function Example() {
const [count, setCount] = useState(0);
return (
<div>
<p>You clicked {count} times</p>
<button onClick={() => setCount(count + 1)}>
Click me
</button>
</div>
);
}
Hooks are a new addition in React 16.8.
See: Hooks at a Glance
function ExampleWithManyStates() {
const [age, setAge] = useState(42);
const [fruit, setFruit] = useState('banana');
const [todos, setTodos] = useState([{ text: 'Learn Hooks' }]);
}
import React, { useState, useEffect } from 'react';
function Example() {
const [count, setCount] = useState(0);
useEffect(() => {
document.title = `You clicked ${count} times`;
}, [count]);
return (
<div>
<p>You clicked {count} times</p>
<button onClick={() => setCount(count + 1)}>
Click me
</button>
</div>
);
}
If you’re familiar with React class lifecycle methods, you can think of useEffect
Hook as componentDidMount
, componentDidUpdate
, and componentWillUnmount
combined.
By default, React runs the effects after every render — including the first render.
import React, { useState, useEffect } from 'react';
function FriendStatus(props) {
const [isOnline, setIsOnline] = useState(null);
useEffect(() => {
function handleStatusChange(status) {
setIsOnline(status.isOnline);
}
ChatAPI.subscribeToFriendStatus(props.friend.id, handleStatusChange);
return () => {
ChatAPI.unsubscribeFromFriendStatus(props.friend.id, handleStatusChange);
};
}, [props.friend.id]);
if (isOnline === null) {
return 'Loading...';
}
return isOnline ? 'Online' : 'Offline';
}
Effects may also optionally specify how to “clean up” after them by returning a function.
function FriendStatus(props) {
const isOnline = useFriendStatus(props.friend.id);
if (isOnline === null) {
return 'Loading...';
}
return isOnline ? 'Online' : 'Offline';
}
Also see: Hooks FAQ
Hook | Description |
---|---|
useState (initialState) |
|
useEffect (() => { … }) |
|
useContext (MyContext) |
value returned from React.createContext |
Full details: Basic Hooks
Hook | Description |
---|---|
useReducer (reducer, initialArg, init) |
|
useCallback (() => { … }) |
|
useMemo (() => { … }) |
|
useRef (initialValue) |
|
useImperativeHandle (ref, () => { … }) |
|
useLayoutEffect |
identical to useEffect , but it fires synchronously after all DOM mutations |
useDebugValue (value) |
display a label for custom hooks in React DevTools |
Full details: Additional Hooks
#DOM nodes
class MyComponent extends Component {
render () {
return <div>
<input ref={el => this.input = el} />
</div>
}
componentDidMount () {
this.input.focus()
}
}
Allows access to DOM nodes.
See: Refs and the DOM
class MyComponent extends Component {
render () {
<input type="text"
value={this.state.value}
onChange={event => this.onChange(event)} />
}
onChange (event) {
this.setState({ value: event.target.value })
}
}
Pass functions to attributes like onChange
.
See: Events
#Other features
<VideoPlayer src="video.mp4" />
class VideoPlayer extends Component {
render () {
return <VideoEmbed {...this.props} />
}
}
Propagates src="..."
down to the sub-component.
React.createClass({ ... })
React.isValidElement(c)
ReactDOM.render(<Component />, domnode, [callback])
ReactDOM.unmountComponentAtNode(domnode)
ReactDOMServer.renderToString(<Component />)
ReactDOMServer.renderToStaticMarkup(<Component />)
There are more, but these are most common.
See: React top-level API
#JSX patterns
const style = { height: 10 }
return <div style={style}></div>
return <div style={{ margin: 0, padding: 0 }}></div>
See: Inline styles
function markdownify() { return "<p>...</p>"; }
<div dangerouslySetInnerHTML={{__html: markdownify()}} />
See: Dangerously set innerHTML
class TodoList extends Component {
render () {
const { items } = this.props
return <ul>
{items.map(item =>
<TodoItem item={item} key={item.key} />)}
</ul>
}
}
Always supply a key
property.
<Fragment>
{showMyComponent
? <MyComponent />
: <OtherComponent />}
</Fragment>
<Fragment>
{showPopup && <Popup />}
...
</Fragment>
#New features
You can return multiple elements as arrays or fragments.
render () {
return [
<li key="A">First item</li>,
<li key="B">Second item</li>
]
}
render () {
return (
<Fragment>
<li>First item</li>
<li>Second item</li>
</Fragment>
)
}
render() {
return 'Look ma, no spans!';
}
You can return just a string.
class MyComponent extends Component {
···
componentDidCatch (error, info) {
this.setState({ error })
}
}
Catch errors via componentDidCatch
. (React 16+)
See: Error handling in React 16
render () {
return React.createPortal(
this.props.children,
document.getElementById('menu')
)
}
This renders this.props.children
into any location in the DOM.
See: Portals
const el = document.getElementById('app')
ReactDOM.hydrate(<App />, el)
Use ReactDOM.hydrate
instead of using ReactDOM.render
if you’re rendering over the output of ReactDOMServer.
See: Hydrate
#Property validation
import PropTypes from 'prop-types'
See: Typechecking with PropTypes
Key | Description |
---|---|
any |
Anything |
Key | Description |
---|---|
string |
|
number |
|
func |
Function |
bool |
True or false |
Key | Description |
---|---|
oneOf (any) |
Enum types |
oneOfType (type array) |
Union |
Key | Description |
---|---|
array |
|
arrayOf (…) |
Key | Description |
---|---|
object |
|
objectOf (…) |
Object with values of a certain type |
instanceOf (…) |
Instance of a class |
shape (…) |
Key | Description |
---|---|
element |
React element |
node |
DOM node |
Key | Description |
---|---|
(···).isRequired |
Required |
MyComponent.propTypes = {
email: PropTypes.string,
seats: PropTypes.number,
callback: PropTypes.func,
isClosed: PropTypes.bool,
any: PropTypes.any
}
MyCo.propTypes = {
name: PropTypes.string.isRequired
}
MyCo.propTypes = {
element: PropTypes.element,
node: PropTypes.node
}
MyCo.propTypes = {
direction: PropTypes.oneOf([
'left', 'right'
])
}
MyCo.propTypes = {
list: PropTypes.array,
ages: PropTypes.arrayOf(PropTypes.number),
user: PropTypes.object,
user: PropTypes.objectOf(PropTypes.number),
message: PropTypes.instanceOf(Message)
}
MyCo.propTypes = {
user: PropTypes.shape({
name: PropTypes.string,
age: PropTypes.number
})
}
Use .array[Of]
, .object[Of]
, .instanceOf
, .shape
.
MyCo.propTypes = {
customProp: (props, key, componentName) => {
if (!/matchme/.test(props[key])) {
return new Error('Validation failed!')
}
}
}
More content at plainenglish.io